2014-09-29

Using rsync over ssh

rsync-ssh-download.bash
-----------------------------------------------------------------------
#! /bin/bash

# SOURCE
SSH_PORT=22
SSH_USER="userA"
SSH_HOST="192.168.0.5"
SSH_PATH="/home/userA/"
# DESTINATION
DST="/home/userB/backup/"
DST_CHOWN="userB"

SRC="${SSH_USER}@${SSH_HOST}:${SSH_PATH}"

CHECK_FAIL=0

    if [ ! -f "/usr/bin/ssh" ]; then
    echo "ssh not found!"
    CHECK_FAIL=1   
    fi

    if [ ! -f "/usr/bin/rsync" ]; then
    echo "rsync not found!"
    CHECK_FAIL=1
    fi
   
    if [ ! -f "/usr/bin/sshpass" ]; then
    echo "sshpass not found!"
    CHECK_FAIL=1
    fi
   
    if [ "$(id -u)" != "0" ]; then
    echo "not root"
    CHECK_FAIL=1
    fi
   
    if [ $CHECK_FAIL -eq 1 ];then
    exit 0
    fi

   
read -s -p "Enter SSH Password: " pswd
echo ""
echo "Connecting..."

/usr/bin/rsync --verbose --recursive --append --links --copy-dirlinks \
--hard-links --perms --executability --times --delete --chown=${DST_USER}:${DST_USER} \
 --rsh="/usr/bin/sshpass -p '${pswd}' ssh -p ${SSH_PORT} -o StrictHostKeyChecking=no -l ${SSH_USER}" $SRC  $DST

du ${DST}  --max-depth=0 --block-size=MB
echo "Complete"

-----------------------------------------------------------------------
rsync-ssh-upload.bash
-----------------------------------------------------------------------
#! /bin/bash

# SOURCE
SRC="/home/userB/backup/"
# DESTINATION
SSH_PORT=22
SSH_USER="userA"
SSH_HOST="192.168.0.5"
SSH_PATH="/home/userA/"
DST_CHOWN="userA"

DST="${SSH_USER}@${SSH_HOST}:${SSH_PATH}"

CHECK_FAIL=0

    if [ ! -f "/usr/bin/ssh" ]; then
    echo "ssh not found!"
    CHECK_FAIL=1   
    fi

    if [ ! -f "/usr/bin/rsync" ]; then
    echo "rsync not found!"
    CHECK_FAIL=1
    fi
   
    if [ ! -f "/usr/bin/sshpass" ]; then
    echo "sshpass not found!"
    CHECK_FAIL=1
    fi
   
    if [ "$(id -u)" != "0" ]; then
    echo "not root"
    CHECK_FAIL=1
    fi
   
    if [ $CHECK_FAIL -eq 1 ];then
    exit 0
    fi

du ${SRC}  --max-depth=0 --block-size=MB
   
read -s -p "Enter SSH Password: " pswd
echo ""
echo "Connecting..."

/usr/bin/rsync --verbose --recursive --append --links --copy-dirlinks \
--hard-links --perms --executability --times --delete --chown=${DST_USER}:${DST_USER} \
 --rsh="/usr/bin/sshpass -p '${pswd}' ssh -p ${SSH_PORT} -o StrictHostKeyChecking=no -l ${SSH_USER}" $SRC  $DST

echo "Complete"


 -----------------------------------------------------------------------


2014-09-17

Splitting merging and converting audio files on Linux is easy

I always try to avoid lossy audio formats but sadly it is not always possible.
Three days a week my trip to work takes about 75min x 2.
Radio some times annoy me.  May Car CD player supports only Audio disks.
So by now I have 35 of them...
Half of them is not music. I have documentary audio, vocabulary course, etc...
Depending on the mood, some times smart people talking, makes the time on the trip go faster... 
It's very inconvenient to manage CD while driving when you have more then 4. Also They scratch constantly... 
So I bought FM Modulator. It's not very expensive and it's a little bit better solution. My FM Modulator support only *.mp3 and *.wma formats.


Now instead of burning CD's, I make proper *.mp3 file to SD card.

It is gratifying that there is a graphical tools on Linux, that is really easy to use.

wavbreaker

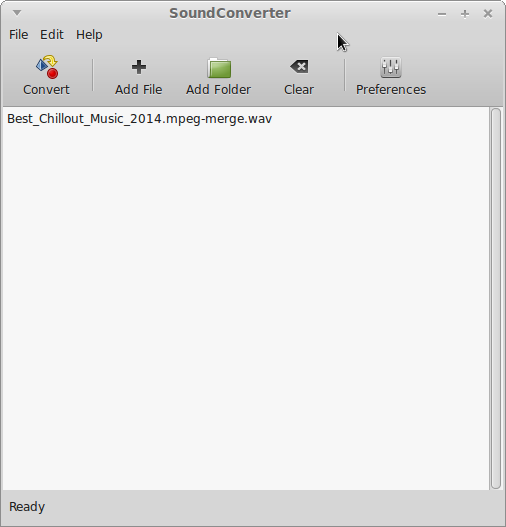
soundconverter


Only one thing I do in command line is:

$ normalize-audio ./file.mp3

IMPORTANT: every time you convert file to lossy audio format, you always loose quality. So if you need final result to be for example *.mp3, make sure you converted only once!


2014-09-04

How should I call this?

 LAMP = Linux + Apache HTTP Server + MySQL relational database management system + PHP

???? = Linux + Lighttpd + Sqlite + PHP-cgi;
     

2014-08-20

Private MailBox on Raspberry Pi


Buy a domain "something.com" or "somethingelse.eu" or what ever.
For my domain name, I paid ~10 euro for a year.
I bought from http://www.serveriai.lt/
I assume that Raspberry Pi you already have. And You also have stable internet at home and you can access your network from outside it means external static IP or IP that changes very rarely.
 
If you thinking , why do I need this, there is a lot free mail accounts on google yahoo etc...
Don't ask me! I am gonna ignore you!

Installation:

# aptitude install lighttpd

# aptitude install postfix  

# aptitude install dovecot-core dovecot-imapd

download roundcube and extract to /var/www/

install by following instructions in
http://<yourDomainName>/roundcubemail/installer/

Configuration:

lighttpd have to be configured for php support, more info about it is in here

Add your domain name to:
$ sudo nano /etc/hosts
127.0.0.1    localhost <domanName>

Testing:

Make sure tcp ports are open:

# netstat -nat
tcp        0      0 0.0.0.0:80              0.0.0.0:*               LISTEN      lighttpd
tcp        0      0 0.0.0.0:143             0.0.0.0:*               LISTEN    dovecot
tcp        0      0 0.0.0.0:25              0.0.0.0:*               LISTEN      postfix
 

For you to get mail's outside your local network, You have to open tcp port 25 for public in your router, but right after you open to public, definitely test you postfix configuration otherwise you can be banned for spam. 
Test is very easy:


http://www.mailradar.com/openrelay/


Adding user for mail:


# adduser <userName>
# usermod -a -G mail <userName>


If you want to add <firstName.lastName> do it like this:
 
# adduser --force-badname <firstName.lastName>


It's not super fast, but it fast enough for me to use it. I am still testing...  but I like it so far!


** Update **


You will be spammer by default unless your internet provider can help you and set "reversDNS" for you.

So now I have to decide, ether I change my internet provider and pay more money and than continue with mail box or spare some money and forget this idea. 


2014-07-08

How to set swappiness on Linux


To check:   
$ cat /proc/sys/vm/swappiness

To set till second reboot:
$ sudo sysctl vm.swappiness=5

To set  permanently:
$ sudo nano /etc/sysctl.conf
Add line at the end
$ vm.swappiness=5

2014-06-17

Custom date time format on MATE panel


Install dconf-editor


Go to:

 /org/mate/panel/objects/clock/prefs


Change values:


NAME                            VALUE
custom-format               %Y-%m-%d  %A <b>%H:%M</b>
format                           custom